11.28.2014

Black Friday is NOW!

Happy Black Friday. Did you get out and about today for shopping? Regardless of your answer, I've got some great deals for you! My card features three items currently deeply discounted through the Online Extravaganza!

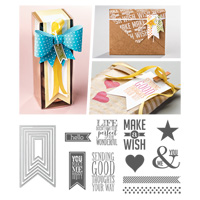
  • Perfect Banners Clear-Mount Bundle (Perfect Pennants & Banner Framelits) -$48.90 $34.22
  • Hearts Border Punch - $15.95 $7.97
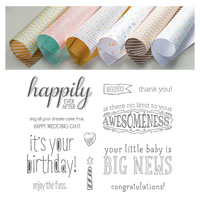
  • Big Lullabye Clear-Mount Bundle (Lullabye DSP & Big News) - $42.90 $32.00
  • Pistachio Pudding card base  
Ready for more deals? Use hostess code MY9FRJP6 to place an order with me today. I am giving a free gift with each purchase during Online Extravaganza. But I think the pot should be even sweeter today. Each person who places an order with me between 12:00am and 11:59pm Friday, November 28, 2014 will receive free shipping on all orders placed with me during the next 12 months. You must contact me directly with your order, or use hostess code MY9FRJP6 to order online to be eligible. 

Happy shopping! When you need a break from shopping, or more inspiration check out the other design team cards at SSINK!


11.27.2014

Thank YOU!

As you celebrate Thanksgiving with loved ones, I hope that you know that I'm grateful for each and every one of my readers. I have truly enjoyed sharing my crafting passion with you the last four years.

Most of the cards I post here, I make with the intention of sharing them with you. This card I made specifically for YOU!


Aside from the Crumb Cake card base, this entire card is made from the Happiness Project Life Card Kit and Accessory Pack.

I hope that you enjoy your holiday time with whomever you have chosen to surround yourself with! Happy Thanksgiving!

11.26.2014

December Daily

Hard to believe that December is right around the corner! I have a little stress relief however thanks to "finishing" today's project already.

This is my December Daily album.


I created it using the Cherry Cobbler 6" x 8" Project Life album and the Hello, December Project Life Card Collection. The Cherry Cobbler album is sold out, but never fear; the same album is available in Early Espresso!

I've got all of my cards put in to the pockets so now all I have to do is journal and add pictures, and I can keep track of my entire month of December 2014!


The great thing about this project is that I can move the cards around. I have a card on December 6th that says, "let it snow." If it doesn't snow that day, I can move it to a page for a date that it did snow!

Grab your Project Life goodies today and get your own December Daily started! I promise it will only take an hour of prep time, tops!

Check out SSINK today for more ideas and inspiration!

11.24.2014

HUGE Online Extravaganza!

Today kicks of one of Stampin' Up!'s biggest sales of the year! For one week only, you can save up to 50% off some of your favorite items!

Today only (and while supplies last), you can get 30% off the Gift Box Punch Board, 30% off a Card Kit Bundle, and select embossing folders for $5 each!

Plus there's more! Check out the flyer for all of the great deals.

Wait, I'm not done yet! Use hostess code MY9FRJP6 to place your order and you'll receive a free gift from me! stampinup.com

There's more! Join my team this week, and you can pick $125 worth of merchandise in your starter kit for only $75! Click here to join today! 

Contact me at stampin_dj@ymail.com with any questions you may have about any of these great deals.

11.19.2014

Gift Card Envelope with Tutorial


The designers at Stylin' Stampin' INKspiration are sharing their favorite gift card holders today. I found the idea for this little gem on Pinterest. Would you like to make one? (Or lots for that matter, they are really quick and simple.)

To start you'll need two 4" x 12" pieces of double sided Designer Series Paper (I used All Is Calm from the Holiday Catalog), the Circles Framelits and your Big Shot.


Next, cut out four circles and fold them all in half.


The next step is the hardest part. Glue them all together so they overlap, but you can still fold the flaps over.


Put your gift card inside and then fold the flaps in like your closing up a box without tape.


I trimmed mine with the Silver 1/8" Ribbon. You could also easily add a label to the outside and write a little note inside.


11.18.2014

Stamp Set Focus: Truly Grateful

The designers at Stylin' Stampin' INKspiration are focusing on a truly wonderful stamp set for this time of year: Truly Grateful. It is available for purchase in wood-mount, clear-mount, or as a digital download. I chose to use the digital version today and use it with My Digital Studio.


  • My Digital Studio
  • Truly Grateful stamp brush download
  • Mossy Meadow (80% opacity for solid background, 100% opacity for wood image)
  • Oval Punch in Soft Suede at 41% opacity
  • Wheat in Hello Honey 
  • Truly Grateful in Early Espresso
  • Brass Brads - top one starts at 100% opacity and then reduces 10% on each lower one.

11.17.2014

#ssinkss15

Welcome to my feature of the Stylin' Stampin' INKspiration layout sketch challenge for #ssinkss15. Here is the sketch we were tasked with:


I was inspired to use this sketch for a double layout. Click on the image for an enlarged view.


I created this using My Digital Studio and, of course, had to feature my adorable nieces. They really have grown in the last 11 months!

We'd love to have you play along with our challenge by linking up at SSINK!

11.12.2014

Hopping With Gratitude

Yesterday I witnessed an act of kindness that brought tears to my eyes. One of the student workers in our office bought something pretty spectacular for another one of the students. The recipient lost her mother a few weeks ago, and she's been having a pretty rough semester, so it made this gesture seem even more grand.

Afterwards, she looked at me and said, "what do I do?" I told her that in these situations you just say "thank you." I came home and made this card for her to use to express her thanks if she so desires.

The Stylin' Stampin' INKspiration Design Team has an entire day full of gratitude for you on our monthly blog hop. As you hop along, please be sure to comment and show some love on every blog! We are always excited to hear from our followers! You should have just left stop number 7 on the Stylin' Stampin' INKspiration Blog Hop - Kim R. of Stamping with Kim. If so, you are in the right spot. If a link doesn't work or you get off track, you will find the full blog hop lineup below.


  • Mossy Meadow card base - 5-1/2" x 8-1/2", scored at 4-1/4"
  • Color Me Autumn Designer Series Paper layer - 4" x 5-1/4"
  • Color Me Autumn DSP - cut with Banner Framelits
  • Gratitude For Days stamp set - stamped in Mossy Meadow on Crumb Cake cardstock, cut with Square Framelits and Banner Framelits
  • Mossy Meadow card stock cut with Square Framelits
  • Regals Designer Buttons

http://inkadoodlecreations.blogspot.com/2014/11/full-of-gratitude-november-ssink-blog.html

Blog Hop Participant List:
  1. Darcy at Dj's Stampin' Place
  2. Cynthia at Ink-A-Doodle Creations
  3. Diana at Stampin' Fun with Diana
  4. Bree at Craft-Somnia
  5. Donna at Organized Chaos
  6. Tonya at Stamp with Tonya
  7. Kim at Stamping with Kim


Thanksgiving Table Decor

Have you started planning your Thanksgiving Table Decor? I decided this year that I would make a place card of sorts that each guest can journal on.


Here is what the inside looks like:


I used the Envelope Punch Board to create the envelope to hold the journaling card.


I decided that my inner card would be 3" x 7" so I found on the Envelope Punch Board that my Chocolate Chip card stock needed to be 8-1/4" x 8-1/4".


Per the instructions on the punch board, I lined up the left edge at 2-3/4" and punched and scored.


Next, I turned my paper counter-clockwise and lined the "tail" up with the score mark I just made. I punched and scored again. I repeated it on the other two sides and finally had this:


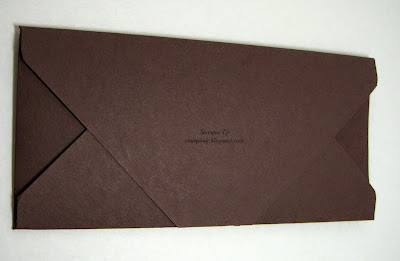
I trimmed off one of the small flaps at its score mark so that I would have an open top. I also had to trim the two larger flap to create this:


The only adhesive I used was two lines of Fast Fuse on the outer most flap:


Here is my finished envelope:


I used the following supplies to embellish it with:

  • Very Vanilla cardstock
  • Epic Alphabet stamp set
  • Gratitude For Days stamp set
  • 1-3/8" Circle Punch
  • Scallop Circle Punch
  • Burlap Ribbon
  • Tangelo Twist ink
  • Tangelo Twist cardstock
  • Autumn Wooden Elements
  • Pumpkin Pie Blendabilities - Darkest


I hope you've been INKspired to use Stampin' Up! to decorate your Fall Feasts table. Check out Stylin' Stampin' INKspiration for a fun centerpiece from Shellie! 

11.11.2014

Happy Veterans' Day

A huge thank you goes out to all who have served, who are serving, or who will serve. You and your families are appreciated!


  • Whisper White card base - 5-1/2" x 8-1/2", scored at 4-1/4"
  • Embossed with Star embossing folder and Texture Boutique machine
  • Marina Mist card stock - cut with Big Shot and Top Note die
  • Another Thank You stamp set - stamped in Night of Navy
  • Red Glimmer Paper, Silver Glimmer Paper, White Glimmer Paper (spritz with Night of Navy ink) - cut using smallest Star Framelits and Big Shot

11.10.2014

#ssinkcs15

It's card sketch Monday at SSINK! Please play along with us by linking up or tagging wherever you post your card with #ssinkcs15.


  • Crushed Curry card base - 5-1/2" x 8-1/2", scored at 4-1/4"
  • Always Artichoke layer - 4" x 5-1/4"
  • Color Me Autumn Designer Washi Tape
  • Gratitude For Days Photopolymer stamp set - stamped on Very Vanilla with Always Artichoke ink - punched with Scallop Oval punch
  • Epic Alphabet stamp set - stamped on Very Vanilla with Cajun Craze ink - cut with Oval framelits - trimmed with Paper Trimmer
  • Blackberry Bliss cardstock - cut with Oval framelits

11.06.2014

Gratitude For Days

In the last five years, November has become my favorite month. While we should all practice gratitude every single day, I love that it is so open and widespread this month. It make my heart happy.

I was very excited when I saw the Holiday Catalog and our brand new Gratitude For Days Simply Created Kit. I'm sharing it as part of my featured designer post at SSINK.


What better way to share your gratitude with others than to hang it on a wall?! This kit comes with everything you see here. All you need is adhesive and a pen. However, if you want to embellish it a bit, you can get the Gratitude For Days Photopolymer Stamp Set. It's available in English, Spanish, and French.


I used the 20__ stamp so that I could journal for each day this month this year. Next year, I can pull it out, and do the same thing for 2015!

I don't have the entire thing on my wall yet, but have decided I will do five rows of six. Here's my first row:


You can click on the pictures to enlarge them.


Here's a close up of one of the pockets and cards so you can see how much room you'll have to journal.


Aside from the grateful part of things, I love this kit because it features our fabulous In Colors for 2014-2016. Also, it comes with two extra note cards (in case you mess up or have more to say). The cord to hang them on has plastic on the ends like your shoestrings, so it really will hold up for many years.

This would be a great family project to do with your kids! It's not too late to order it either. We're only 5 days in to the month! I think it will be fun to look back year after year. What do you think?

This kit would also make a great advent calendar, chore calendar, etc. What other uses can you think of for it?