9.06.2012

September blog hop

Hi! Thanks for joining the Stylin' Stampin' Squad September blog hop! I'm so excited to show my latest creations to you!

What did you think of Heather's projects? She always has such cute projects!

This is the gift set I created for this month.


My intention this month was to CASE (copy and share everything) a really cute CAS (clean & simple) card that I saw earlier this week. What started out in my mind as a back to school "apple for the teacher" card ended up a fall "thank you" card.


The idea for the milk carton I did CASE from another demo. What a genius idea to use the framelits to make a window before you assemble the carton! One side has an apple cut out, the other side a pear cut out. I filled the carton with two Apple Pear'adise tea lights that I had gotten from Gold Canyon. The "windows" provide a perfect vent to allow the scent to come out. These would be great for a teacher's desk where she needed a little smell good scent, but couldn't burn an actual candle!


Thank you for joining me today. I look forward to hearing what you thought of my projects.
Hop on over to the very talented Kim's blog and be sure to leave her some love too!

Blog Hop Participants:
  1. Shellie G. of Creative Electica
  2. Annie L. of Love Me Cards
  3. Pam S. of Stampin' in the Sun!
  4. Nancy B. of Lady Stamps-A-Lot
  5. Rose C. of Stamp with Rose
  6. Tonya B. of Stampin' with Tonya
  7. Dawn S. of Dawn's Creative Chalet
  8. Patricia T. of Sunnyone Stampin'
  9. Heather W. of Stamping with Heather
  10. Darcy J. of DJ's Stampin' Place
  11. Kim R. of Stamping with Kim
  12. Nancy B of Momma B Stampin'

9.03.2012

MDS 2

Happy Labor Day! Finally a day off that I can devote to everything that hasn't gotten done in the past month. I had wanted to get my Wichita Zoo album finished during August to take advantage of the 31% off special on all print products. Luckily for me (and you) Stampin' Up! extended the promotion until September 14th!

I upgraded my version of My Digital Studio to the new My Digital Studio 2. Stampin' Up! has done it again. They took an already wonderful product and made it fabulous!

This is what I love about MDS2:

-More page layout templates
-You can round the corner of your pictures
-Stamp images can be colored with different colors instead of the whole image having to be the same color
-You can now work on your album in a double-page layout spread
Screen shot MDS2 software in use


This is perhaps my favorite new feature! It is so much easier than having to view the output to make sure everything is lined up on your spread, go back and fix it, and then view the output again.

This is just an overview of the new improvements that SU! has made on the software. They are still working on some updates that will come out with update releases.

Remember, if you haven't tried out My Digital Studio yet, you can get a 30-day free trial on my website! http://stampindj.stampinup.net  Click on the "Shop Now" button to find the Free Trial button.

8.02.2012

Stylin' Stampin' August Edition


Welcome to the August edition of the Stylin' Stampin' blog hop! This month we are featuring our favorite products from the Holiday Catalog, which you can order from NOW! In addition to the amazing talent you've been visiting the past six months; we've added some new talent so make sure you hop to everyone's blog.

My card was CASE'd from page 28 of the Holiday Catalog. That's what happens when your husband tells you the night before that you need to make a card for his retiring co-worker who's last day happens to be the following day! My first FAVORITE thing is that there are so many stamp set and framelit bundles in the new catalog! SO much easier than cutting with scissors.

Supplies used:
Stamps: Perfectly Preserved; Itty Bitty Banners
Cardstock: Sahara Sand
DSP: International Bazaar
Ink: Lucky Limeade; Rich Razzleberry
Ribbon: Chocolate Chip scallop dots; Daffodil Delight Taffeta; Midnight Muse stitched satin
Punch: 3/16" Corner
Big Shot
Bitty Banners Framelits
Snail adhesive; Glue Dots; Dimensionals


My 3-D project was so fun to make! Do you see the jar on the jar? My second FAVORITE holiday item is our new core'dinations cardstock. It works so well with the Woodgrain embossing folder!

Supplies used:
Stamps: Itty Bitty Banners
Paper: Early Espresso Core'dinations; Very Vanilla; Cajun Craze; More Mustard; Gumball Green
DSP: Orchard Harvest
Ink: Early Espresso; Gumball Green
Big Shot
Woodgrain embossing folder
Framelits: Cannery; Bitty Banners
Paper Snips
Stampin' Sanding System
Sticky Strip; Glue Dots

I hope you enjoyed my projects today. I would love to hear what your FAVORITE project or part of a project was!
Answer to last month's challenge question: I used the star from Jolly Bingo Bits to stamp on the back of the red glimmer paper; then used my paper snips to cut them out.

This nifty button will take you right over to fellow night owl stamper, Kim. Happy hopping! 


Blog Hop Participants:
  1. Shellie G. of Creative Electica
  2. Annie L. of Love Me Cards
  3. Pam S. of Stampin' in the Sun!
  4. Nancy B. of Lady Stamps a Lot
  5. Rose C. of Stamp with Rose
  6. Tonya B. of Stampin' with Tonya
  7. Dawn S. of Dawn's Creative Chalet
  8. Patricia T. of Sunnyone Stampin'
  9. Heather W. of Heather's Stampin' Blog
  10. Pamela W. of Stinky Tofu
  11. Darcy J. of DJ's Stampin' Place
  12. Kim R. of Stamping with Kim
  13. Debra of Mommy Scraps

7.05.2012

Stylin' Stampin' Squad July Blog Hop

I can't believe that June is over already and July is upon us! I apologize that I'm behind on my weekly product posts. Between two birthdays, an anniversary trip, work, and training; time flew right on by! I promise that next week I'll be all caught up again!
I bet you just arrived here from Marla's blog. Aren't her projects fabulous? If you are just starting the hop, make sure to make it all the way around. We've got 12 amazing ladies this month and you don't want to miss any of their work!
We all love to hear what others think of our projects. Please show us some love and leave each of us a comment about your favorite project, technique, idea, etc!

Ok, who's ready to see some projects? My card this month was inspired by three friends who all share their birthday with America.
I had made some fabulous note cards with the Natural Composition Designer Series Paper and the Top Note die in Very Vanilla. Looking at what was left from the Top Note, I thought, "this would make a cute card front!"
Supplies used:
Paper: Natural Composition DSP, Very Vanilla cardstock, Red Glimmer paper
Stamp sets: Create A Cupcake, Jolly Bingo Bits
Ink: Midnight Muse
Punches: Word Window, Modern Label
Big Shot & Top Note die
Embellishments: 3/8" Stitched Satin Ribbon in Midnight Muse, Rhinestone Basic Jewels
Adhesive: Snail, Glue Dots


Who can figure out where I used the Jolly Bingo Bits stamp set?

My 3-D project is a cute little wall hanging. There's a beautiful old house in town that has these great vintage fans hanging on their front porch every year for the 4th. They were my inspiration for this project.

Supplies used:
Paper: Red Glimmer paper, Midnight Muse and Whisper White cardstocks
Stamp set: Morning Post Alphabet
Ink: Midnight Muse
Big Shot & Scallop Circle die
Punch: 2 1/2" Circle
Embellishments: 5/8" Organza Ribbon
Adhesive: Snail


Reminder: You can click on each picture for a closer view.
Thanks for stopping by! I hope you enjoyed my projects and I can't wait to read your reviews!
Hop on over to Kim's blog by clicking on this cute MDS-made star! 

  1. Shellie G. of Creative Electica
  2. Annie L. of Love Me Cards
  3. Pam S. of Stampin' in the Sun!
  4. Nancy B. of Lady Stamps a Lot
  5. Rose C. of Stamp with Rose
  6. Tonya B. of Stampin' with Tonya
  7. Dawn S. of Dawn's Creative Chalet
  8. Patricia T. of Sunnyone Stampin'
  9. Heather W. of Heather's Stampin' Blog
  10. Marla R. of Marla's Stampin' Spot
  11. Darcy J. of DJ's Stampin' Place
  12. Kim R. of Stamping with Kim

6.07.2012

Stylin' Stampin' June Hop

It's time again for our monthly hop. I am so grateful that I have the opportunity to join these wonderful demonstrators each month; plus it forces me to take some me time and get creative!

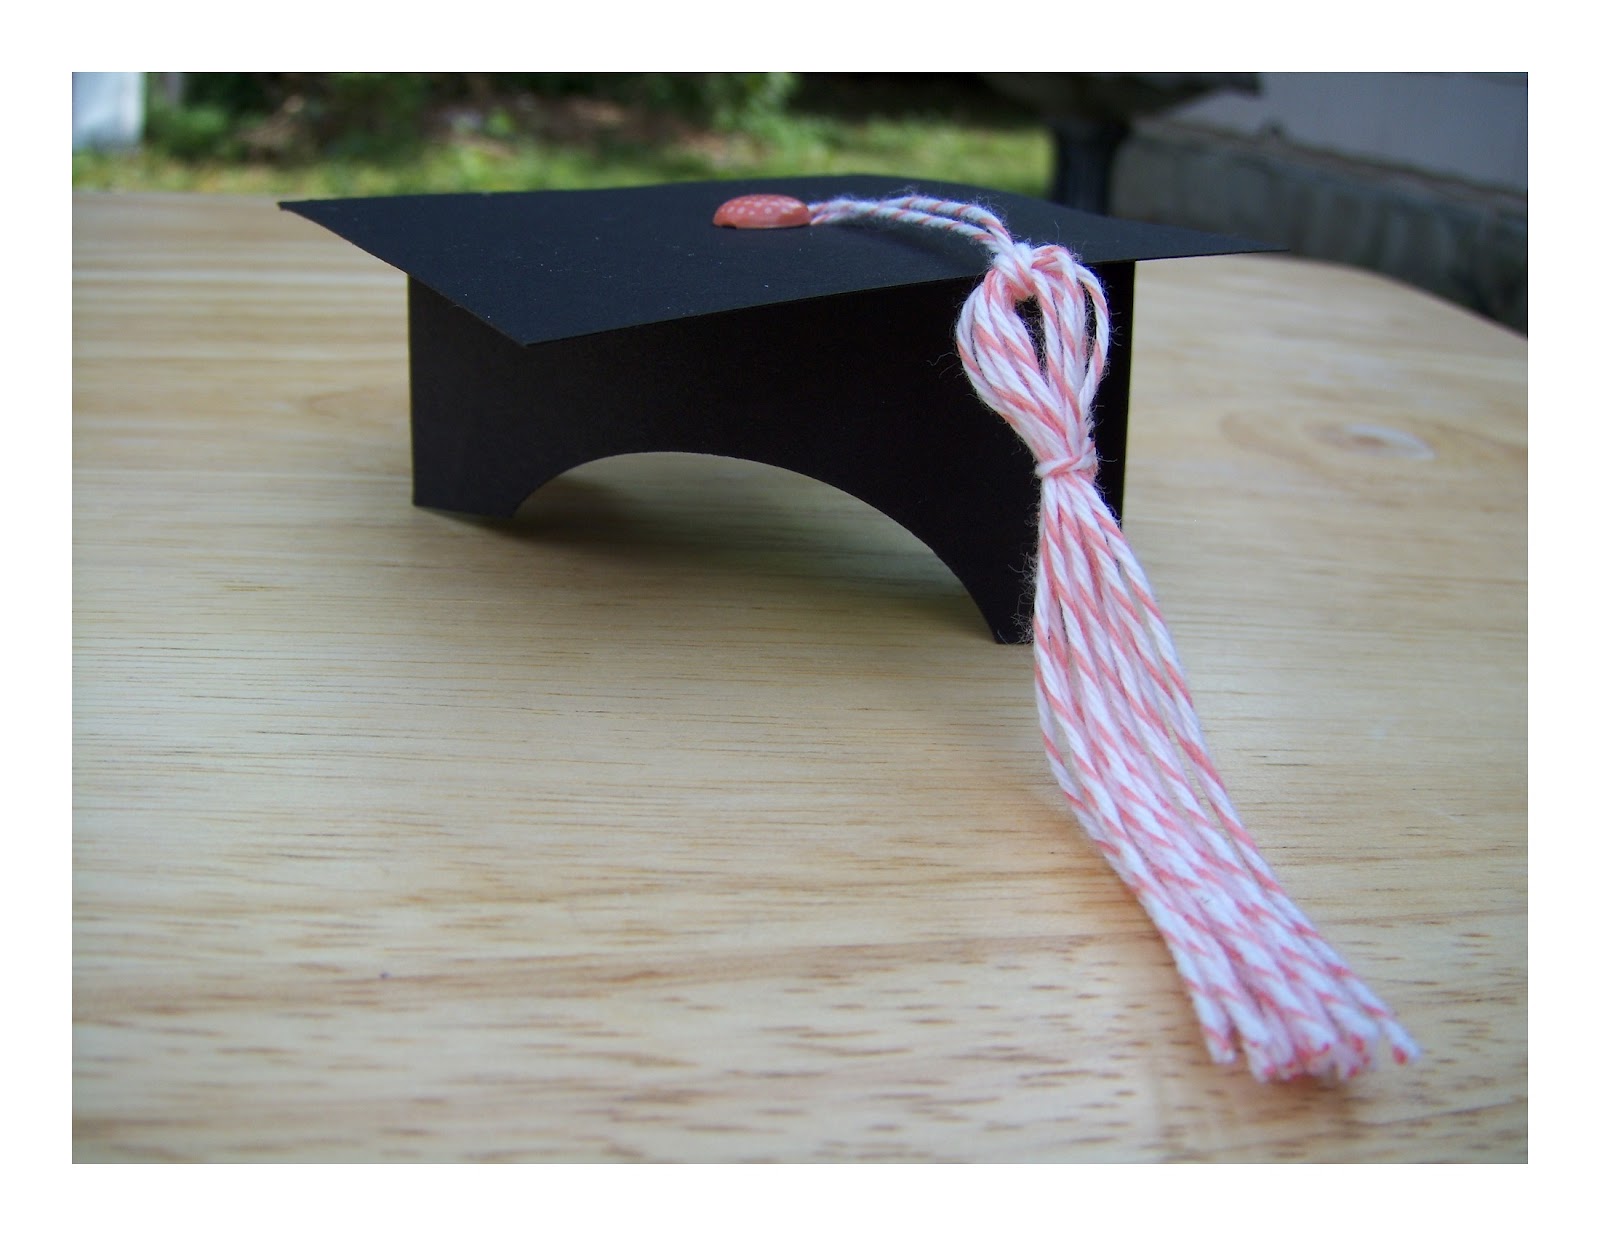
For my 3-D project this month, I chose graduation and went super simple. These cute little caps are quick to make. I think they would be great for party decorations, or to assign place settings.
Supplies used:
Cardstock: Basic Black (2- 3x3 pieces, one folded in half)
Punches: 2 3/8" Circle
Embellishments: Calypso Coral Baker's Twine; 2011-2013 Printed Brads
Adhesive: Tombow Multipurpose
Tools: Tabletop Paper Cutter; Simply Scored; Paper Piercer; Craft Scissors


My card started with one thought in mind and it doesn't look anything like I had originally planned. I knew I wanted to use the 2012-2014 In Colors and the Button, Button set. I had initially intended to have an explosion of buttons on this card. You can see, that didn't happen! I was incredibly pleased with this card as I have had Button, Button since it first came out and I've used it once. It has always been a set I've struggled through designing with.
Supplies used:
Card stock: Baja Breeze; Primrose Petals; So Saffron; Very Vanilla; Gumball Green
Classic Ink (new firm foam pads!): Gumball Green; Midnight Muse; Primrose Petals; Summer Starfruit
Stamp sets: Button, Button; Curly Cute; Four Frames
Adhesive: Glue Dots; Tombow Multipurpose; Snail
Punches: Petite Pennants; Itty Bitty Shapes Punch Pack; 1/2" Circle; 3/4" Circle; Modern Label; 1/16" Circle Handheld; Word Window
Ribbon: Chocolate Chip Scallop Dots
Brads: 3/16" Metallic
Embossing Folder: Adorning Accents
Tools: Color Coach; Tabletop Paper Cutter; Simply Scored; Big Shot; Craft Scissors; Stampin' Scrub; Stampin' Mist


Thanks for stopping by! Please leave me a comment regarding your thoughts/impressions of my projects. Make sure you head on over to Pam's blog now; she always has cute projects!

Blog Hop Participants:
  1. Annie L. of Love Me Cards
  2. Pam S. of Stampin' in the Sun!
  3. Anji C. of Altered Scraps Blog
  4. Rose C. of Stamp with Rose
  5. Tonya B. of Stampin' with Tonya
  6. Dawn S. of Dawn's Creative Chalet
  7. Patricia T. of Sunnyone Stampin'
  8. Heather W. of Heather's Stampin' Blog
  9. Linda O. of Stamp at Linda's
  10. Darcy J. of DJ's Stampin' Place
  11. Pam S. of Sunny Girl Scraps
  12. Kim R. of Stamping with Kim

6.06.2012

2-Way Glue Pen (Stampin' Up! accessories A-Z)

The new Stampin' Up! catalog is here and it is fabulous! You can view it in pdf format over to the left side of the page.
Starting with this new catalog, I'd like to give you a closer look at the accessories we offer. I will be presenting them to you A to Z, with a new post coming to you each Tuesday. Make sure you subscribe by email or follow the page over on the right side of the page so you don't miss out on any of our wonderful products!
Now on with the show!

Today's product is the 2-Way Glue Pen.

Features & Benefits
  • Permanent or temporary bond 
  • Dries quickly 
  • Great for adhering glitter 
  • Blue when wet; clear when dry 
  • 10 grams 
  • Chisel tip 
  • Washes off skin with soap and water
  • Acid free
Quick Tips

Need a temporary bond for a stencil or mask? Or do you need a permanent bond for a card or page? Look no further than the 2-Way Glue Pen.
1. Wet bond (permanent bond): While the glue is still blue and wet, immediately make the bond. Use a wet bond when you apply glitter.
2. Dry bond (temporary): Apply glue lightly and wait for the adhesive to dry (it will become clear). Use this method when masking or positioning stencils. When you are finished, you can remove the bond easily.

FYI

To start the 2-Way Glue Pen, push the tip in a few times and allow the glue to saturate the tip (the tip will turn blue). Always replace the cap after use.


I have created a video (my first ever) to demonstrate the "Quick Tips" and "FYI."


Contact me today to order this versatile product! See you next week for the adhesive remover.

5.03.2012

May Stylin' Stampin' Squad Hop

 
Whether this is your first stop, or you just came from Marla's blog (or beyond); I welcome you.
For this month's projects I decided to focus on the Friendship, though both projects could also be used for kids. I typically don't read any papercrafting magazines, however when baker's twine is featured on the front, it catches my eye! I got these ideas out of a recent copy of Scrapbooks, etc.

Card and 3-D project
Getting to the finished card was a funny road map. Since I pulled all my retiring sets off the shelf already, I was looking at what was left up there for inspiration. When I saw the Create A Cupcake stamp set, I was reminded of a Congratulations card I'd made last year for a friend who had earned high honors with her new Scentsy business. I was honestly just going to use the picture of that card. Then, I remembered the baker's twine article I'd read and thought, "well there's my 3-D project." Then I knew I had to redo the card so it made a little more sense and matched the colors. When I started on my 3-D project, I had all of my baker's twine laid out in front of me; fully intending to use Island Indigo, which I didn't.
I probably never would have put these three colors together for a card had it not been for my twine; however I love the combo and will probably use it a lot more!
I traced the edges of the cupcake "icing" with Tombow to hold the twine in place.

Supplies used:
Cardstock: Lucky Limeade, Calypso Coral, Early Espresso, Very Vanilla
Stamp set: Curly Cute
Punches: Cupcake Builder, Dotted Scallop Ribbon Border
Ribbon: Daffodil Delight 1/8" taffeta, Calypso Coral baker's twine
Adhesive: Dotto, Tombow
The magazine called these cupcakes, I think they look more like giant truffles!
I got a good chuckle today when I went to our local hobby store to get the foam balls. The cashier asked me what I was doing with three foam balls. I responded, "making cupcakes." She looked at my husband like she didn't believe me. I explained that I was wrapping them with baker's twine. My dear husband got all excited on our walk home, asking me when I had gotten the baker's twine. Turns out he's been looking all over our town for baker's twine to cook a chicken. He was a little disappointed when he found out that I was referring to Stampin' Up! baker's twine! :)
These were fairly easy once I got going. They would be a great project to do with your kids; though I caution you, I did end up a little sticky. That's the sign of a great project, right? You could also add embellishment "sprinkles" if you wanted to.

Supplies used:
Ribbon: Early Espresso baker's twine, Calypso Coral baker's twine, Lucky Limeade baker's twine
Adhesive: Crystal Effects
Non-SU: 2" foam balls, cupcake pan liners

I hope you enjoyed my projects today. I definitely had fun making them. (ok, whipping them out!) Please continue on the rest of the hop. If you're going clockwise, you'll head over to Nicole's next, and if you're counter-clockwise, you'll hit Marla's. Enjoy!
Blog Hop Participants:
  1. Shellie G. of Creative Electica
  2. Annie L. of Love Me Cards
  3. Pam S. of Stampin' in the Sun!
  4. Nancy B. of Lady Stamps a Lot
  5. Rose C. of Stamp with Rose
  6. Tonya B. of Stampin' with Tonya
  7. Dawn S. of Dawn's Creative Chalet
  8. Patricia T. of Sunnyone Stampin'
  9. Heather W. of Heather's Stampin' Blog
  10. Pamela W. of Stinky Tofu
  11. Marla R. of Marla's Stampin' Spot
  12. Darcy J. of DJ's Stampin' Place
  13. Nicole B. of Creations by Mommy
  14. Kim R. of Stamping with Kim