
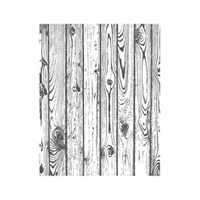
March Madness is almost upon us! This card can be given to your favorite player or fan! I wanted to create the illusion of a hardwood floor, so I stamped the Hardwood image in Chocolate Chip ink on Baked Brown Sugar Cardstock. I then took a foam brush and brushed Crystal Effects over the top to give it that sealed effect. The "Heart. Spirit. Soul. Champions" is from a digital download for My Digital Studio. The {free} embossing folder from the Sale-A-Bration catalog screamed basketball at me when I first saw it. I was going to dry emboss the grooves in the ball as well; but I got tired and the cat started trying to help, so I decided to free hand them with the Basic Black Stampin' Write Marker instead. The full supply list can be found after the tutorial.
To start making the "box" you need a 12" x 12" sheet of cardstock. Trim it to 8-1/2"x 12". Next, use your Simply Scored Tool to score along the 12" side at 2-3/4", 5-1/2", 8-1/4", and 11".

Once, you have done that, trim the cardstock down to 6-1/2" X 12". Then score along the 6-1/2" side at 2-3/4".

Use your paper snips to cut along the shorter score lines, making flaps. Trim the shorter side of the 1" flap off, and cut the bottom part at a diagonal to make it easier to glue together. Fold on all score lines.

Put Sticky Strip on the little tab to hold your box together. Before you glue it together you will want to decorate all of your panels. On the above example, my hardwood pieces were 2-1/2" x 2-1/2". The bottom panels would have been 2-1/2" x 3-1/2" if I had chosen to decorate them.

To create the inserts to glue your pop-up items to, you will use the 2" strip we cut off earlier. You will cut it at 4-3/4". Make sure that the 1" score mark is lined up near the 4-3/4 when you cut. Perhaps the picture will make it more clear.

The result is that you have a score line at 1" from each end when you cut it down. You will then cut this piece in half; resulting in 2 pieces that measure 1" x 4-3/4". Fold on the score lines and put sticky strip on the little tabs. Glue these to the inside of your box so the backs are facing each other. Here's a downward view to clarify.

If you want your back flap to stand up, glue a piece to the back that measures 2-1/2" x 6". The great thing about these cards is that you can fold them flat and send them in a large envelope!
Please let me know if you have any questions regarding the tutorial. I hope to see you tomorrow. If you stop by, you might just see a fun gift card holder with tutorial! Psst! With the new supply list below, you can click on any of the items and it will take you directly to my online store to order them!


No comments:
Post a Comment