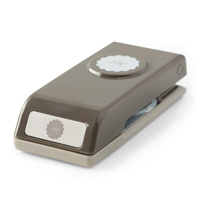
It's that time again! The monthly Stylin' Stampin' Blog Hop! I think this month's theme was tailor-made for me; I love...PUNCHES. My card today features three and a half punches, along with more sneak peeks of some upcoming products!
As you hop along, please be sure to comment and show some love on every blog! We are always excited to hear from our followers! You should have just left stop number 1 on the Stylin' Stampin' Squad Blog Hop - Pam S of Stampin' In the Sun. If so, you are in the right spot. If a link doesn't work or you get off track, you will find the full blog hop lineup below.
Are you tired of reading yet? Do you want to see the card? Ok, I'll quit teasing you.
Believe it or not, I actually pre-ordered quite a bit of product, yet I featured two of the same new products two days in a row. It's because they are awesome! This picture does not do the Blackberry Bliss cardstock or ink justice, but believe me; it is gorgeous. (and goes really well with Crisp Cantaloupe) Also, there is the Hello Honey ribbon making another appearance.
Did you see my post yesterday that really featured the Blendabilities? Well, I used them again today. I found that they will work to color your stamp like the regular markers do. I have to interject a story here. Growing up I had a book about a town that had no color. Someone planted some seeds, and anyone who touched the flowers that grew from them turned color(s). I think the girl's name was Calico Callie, and I remember Mayor Caruthers. If anyone can tell me the title of the book, I'll send you a little Stampin' Up! goodie! It's been driving me crazy! At any rate, when I got the Flower Shop stamp set, this particular flower has always reminded me of that book because of the different patterns on the petals. I did try coloring the petals different colors with the Blendabilities and because of the added time of switching markers, the part that I colored first was dry and wouldn't stamp. The part that I really like is that since the Blendabilities come with three markers in the pack, each a lighter shade of the color, you have some hue flexibility. The flower on the right is Rich Razzleberry!
You might also notice the Coastal Cabana buttons. Those started as clear. Yes, I colored them with the Blendabilities!
Should we get to the punches since that's what this post is really about? Have you figured out the three and a half punches? Scallop Tag Topper, Artisan Label, and 7/8" Scallop Circle. Plus, the corner rounder on the Envelope Punch Board! If you use the Artisan Label with any of the word images from Label Love, the scallops actually go at the top and bottom. I've always used it like that, no matter what project I used it on. Then today it hit me; "hey, I should turn them sideways!" I really like them that way too!
Thanks for joining us today! I'd love to hear what you're favorite part of this card is, since I have many elements. After you pin it, and comment, keep hopping by clicking that Next button below to visit Cynthia, who might just be a fan of coffee, chocolate, and coffee flavored chocolate! ;)
Blog Hop Participant List:
- Pam S. of Stampin' in the Sun
- Darcy J. of DJ's Stampin' Place
- Cynthia R. of Ink-A-Doodle Creations
- Jamie H. of Unique Ink
- Shellie G. of Craft Smashup
- Donna S. of Organized Chaos
- Tonya B. of Stampin' with Tonya
- Bree R. of Craft-Somnia
- Diana E. of Stampin' Fun with Diana
- Kim R. of Stamping with Kim


