Spooky greetings! The September Paper Pumpkin kit was perfect for allowing me to put together Halloween treats for all my coworkers in a short amount of time. It took longer to sort the M&Ms than it did to assemble the kit!
There are 15 of us in the office and there were 16 treat tubes in this kit, so it worked out perfectly! I wonder who will deserve a special treat tomorrow?
Are you signed up for Paper Pumpkin? If not, you are missing out on some fabulous projects that are a snap to put together! Sign up today!
After you're done signing up for Paper Pumpkin, check out the fun (and in some cases downright creepy) Halloween projects our SSINK designers shared today!
A glimpse into my stamping home where I will share with you projects and fun techniques using my favorite Stampin' Up! products.
Showing posts with label halloween. Show all posts
10.31.2016
10.07.2015
Stamp Set Focus: Hostess Sets
Inadvertently, this week's cards seem to be the "week of orange." It is October however, so I think lots of orange is allowed!
Today at Stylin' Stampin' INKspiration, we are featuring projects made with Hostess Exclusive Sets. These sets can be found at the back of the catalog, and can only be purchased using hostess dollars. There are some really cute sets available, therefore, I think you should book a party today so you can get them for yourself!
I had signed up to participate in last month's Mystery Supply Challenge, however I wasn't able to get my card made. I used half of the supplies that Jenn sent me for the card. The two "Boo!" pieces are thanks to Jenn! The bat background is from a Project Life card kit. Project Life: not just for memory keeping!
- Pumpkin Pie card base: 4-1/4" x 11" - scored at 5-1/2"
- Seasonal Snapshot 2015 Project Life Card Collection
- Six Sayings hostess stamp set
- Bermuda Bay ink
- Basic Rhinestones
10.02.2014
Graveyard
I hope you're having a spook-tacular October so far. I'm here to help you get in the mood, if you're not already!
- Garden Green card base - 5-1/2" x 8-1/2", scored at 4-1/4"
- Baked Brown Sugar cardstock - 1-1/2" x 5-1/4" (most of it is covered up, but I cut it that big for ease of layering)
- Night of Navy cardstock - 3" x 5-1/4", ran through Textured Boutique with Lucky Stars Embossing Folder
- Garden Green cardstock - 1-1/2" x 5-1/4", trimmed with Fringe Scissors
- Hello Honey cardstock - 1-3/4" Circle punch, cut with edges once glued down
- Whisper White cardstock - Owl punch, cut off feet; eyes drawn with Smoky Slate Marker
- Smoky Slate cardstock- Note Tag punch; sponged with Smoky Slate ink and marker used to draw cracks
- Alphabet Rotary Stamp (on sale until 10.06.14 for $11.21)
10.18.2013
Sweet Labels
Halloween is just around the corner, so a few of the designers at SSINKspiration wanted to give you some ideas for packaging candy for your favorite ghouls and goblins this year.
Today I used the Labels Collection framelits to package my candy bars.
To create your packaging, you will need to cut two of the labels in the same size. As in the second picture, line the second "dip" up with the cutting track on your Paper Trimmer and cut this piece off. You will do this on both framelit cut-outs. Next, place the cut edge against the left side of your Simply Scored and score at 3/4". You will do this on both pieces. The final picture shows both pieces cut and scored. Next adhere together with sticky strip by layering one flap over the other.
One great thing about the framelits, is that since you have various, nesting sizes in the collection, you can use them to create for any size project.
For the XL size Symphony bar, I used the largest size framelit. I used some of the paper from the Modern Medley Designer Series Paper package to wrap around the candy bar to dress it up. I used the third largest framelit to cut a piece of the DSP to layer on my label.
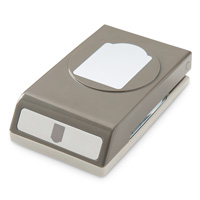
For the "regular" size candy bar, I used the second largest framelit. To create the handle, I used the Large Oval punch. Out of the three, this one definitely stands up by itself the best.
For the fun size candy bars, I used the fourth largest framelit. To secure the top, I used a Pumpkin Pie brad from the Brights Glimmer Brads. I'm now taking bets on whether my husband will eat the other 57 fun size bars in this bag, or if we'll have some left to hand out to trick or treaters.
As you can see, the possibilities are endless with this one for size and embellishing. I hope this has inkspired you to create some outside the box packaging for your sweet treats this year! Be sure to Pin It so you can reference it later. Clicking the Pin It button at the top will let you choose any of the pictures in this post to pin. Then head on over to SSInkspiration to check out more great ideas!
10.03.2013
Bloody Eyeball
Since Halloween is right around the corner, I thought I should start making some creepy cards. I had a lot of fun with this one, especially since my husband was helping me design it.
While I only used one stamp set, I utilized several punches; including some you might not suspect. The blood in the eyeball was achieved using the Real Red Stampin' Write marker; the journaling end. The blood drops is the small heart punch cut in half, and the blood pool started out as the Large Oval, but I trimmed it down a lot.
Thanks for stopping in. Hope you enjoyed today's fun! Here is a list of all the supplies used:
Cardstock: Old Olive, Sahara Sand, Rich Razzleberry,
Basic Black, Whisper White
Ink: Basic Black
Marker: Real Red
Stamp set: ABC-123 Sketch Alphabet
Punches: 1-3/4" Circle, 1" Circle, 3/4" Circle, Small Heart, Large Oval
Other: SNAIL, Paper Trimmer, Paper Snips, Stampin' Scrub, Stampin' Mist
Subscribe to:
Posts (Atom)