A glimpse into my stamping home where I will share with you projects and fun techniques using my favorite Stampin' Up! products.
Showing posts with label Christmas card. Show all posts
9.13.2016
It's a Mystery
Hello! Welcome to another installment of the Stylin' Stampin' INKspiration blog hop. This month everything is a mystery!
You are currently at stop #1. You may be starting here, or you may have come here from Cheryl's blog. If you get off track, or a link doesn't work, there is a complete hop list at the bottom of each post. We hope you enjoy!
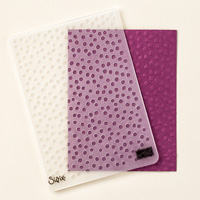
So you may be wondering what I meant when I said it was a mystery. Each of us sent items to each other that we were required to use on our project for this month. This is what Cheryl sent me.
And this is what I created with these supplies.
Since Cheryl had already used a thinlit to "decorate" the tree, I used the Metallic Thread that she sent along to thread through the holes for a garland effect. I added a Metallic Gold Star to the top the tree.
Mint Macaroon and Cherry Cobbler were two of the colors featured in the piece of Designer Series Paper that Cheryl sent me. This is how I chose the colors of card stock and ink to use. Through this, I discovered that I LOVE Cherry Cobbler stamped on Mint Macaroon!
I love the products that Cheryl sent, especially since I personally only own one of the three products myself. It was great to get to play with new items! Thanks, Cheryl, for the INKspiration and great products!
I sent my three items to Diana. She said that my items were quite a challenge, but I knew she was up for it! Let's head over to her blog with the Next button and see what she came up with!
Blog Hop Participant List:
1. Darcy at Dj's Stampin' Place
2. Diana at Stampin' Fun with Diana
3. Carrie at Carrie Stamps
4. Tobe at The Craft Sea
5. Jennifer at Jenny G Paper Stamps
6. Cheryl at Create with Cheryl
9.16.2014
Christmas Cards
If your Facebook news feed is like mine, I'm sure you've seen the XX Fridays until Christmas pictures. There are now only 14 Fridays until Christmas, so it might be time to start thinking about Christmas cards!
This card features a little traditional and non-traditional.
I realized after I made this card, that it fit the requirements at the Merry Monday Christmas Challenge, so I'm submitting it there too.
This card features a little traditional and non-traditional.
- Lost Lagoon card base - 4-1/4" x 11", scored at 5-1/2"
- Decorative Dots Embossing Folder - used on card base
- Whisper White layer - 3" x 4"
- All Is Calm Designer Washi Tape - used to cover Whisper White layer
- Merry Everything stamp set - stamped in Cherry Cobbler on Whisper White
- Note Tag Punch - coordinates with Merry Everything (save 15% when purchasing the bundle)
- Basic Rhinestones
I realized after I made this card, that it fit the requirements at the Merry Monday Christmas Challenge, so I'm submitting it there too.
12.13.2013
12 Cards of Christmas-Day 7
It is Framelits Friday! I had to save this card to share with you today. It was quick and simple, and packs a lot more punch in person. I hope you enjoy it!
Supplies used:
Cardstock: Baked Brown Sugar, Old Olive, Cherry Cobbler, Whisper White
DSP: Season of Style Designer Series Paper Stack
Stamp: Merry Little Christmas
Ink: Cherry Cobbler
Ink: Cherry Cobbler
Tools: Paper Trimmer, Big Shot
Accessories: Deco Labels Framelits
Adhesive: SNAIL, Stampin' Dimensionals
Make sure to stop over at Stylin' Stampin' Inkspiration to see what the other designers have created.
12.12.2013
12 Cards of Christmas-Day 6, plus a bonus
Thank you so much for joining us for the December Stylin' Stampin' Squad Blog Hop! This month our projects focus on quick and easy gift ideas for the holidays. As we enter the month of December, we find that the Christmas holidays are fast approaching. From decorating our homes to holiday baking, we realize that shopping days are running low. That's why we want to share quick and easy gift ideas that anyone can create in time for that special someone!
As you hop along, you will see that many of our design team members are giving away some great blog candy this month. Leave a comment for each project and you will automatically be entered in to win! Winners will be announced Monday, December 16th on our individual blogs, so don't forget to leave us those comments! We love to hear from our readers!
You should have just left stop number 1 on the Stylin’ Stampin’ Squad blog hop – Dawn B of Dawn's Creative Chalet. If so, you are in the right spot. If a link doesn’t work or you get off track, you will find the full blog hop lineup below.
My card came together quickly. I started with the washi tape embellishment, and then turned to my Color Coach for inspiration for the other colors. The tealights make a fun gift that is very simple. If you're like me, you already have plenty of tealights and washi tape around the house; so this one is also inexpensive!
![]() |
Supplies used: Season of Style Washi Tape |
***BLOG CANDY ALERT*** Leave a comment and be entered to win a Mystery Grab Bag of Stampin' Up! products valued at $20!
Thanks for stopping in. See ya tomorrow for Framelits Friday! Now head on over to Annie's to see what she has created for us today.
Blog Hop Participants:
Dawn S. of Dawn's Creative Chalet
Darcy J. of DJ's Stampin' Place
Annie L. of Love Me Cards
Cynthia R. of Ink-a-Doodle Creations
Jamie H. of Unique Ink
Kim R. of Stamping with Kim
Tonya B. of Stampin' with Tonya
Diana E. of Stampin' Fun with Diana
Heidi B. of Stuck on Stampin'
Bree R. of Craft-Somnia
Anastasia R. of Stampin' Blondie
Pamela W. of Stinky Tofu
Darla R. & Nancy K. of Stampin With Darla and Sisters
12.05.2013
12 Cards of Christmas-Day 3; plus...
It's my 100th blog post! Thanks for joining me on this journey! It's been great fun for me. I hope that you've found inspiration on my blog and will continue to join me. How about today's card and then some blog candy?
I wasn't sure how I felt about this card as I was making it; however once it was finished, the more I stared at it, the more I loved it. It's definitely become one of my favorites.
I mixed the black embossing powder with the silver glitter. I didn't measure it, but I recommend you use at least 2 to 3 times the amount of embossing powder that you do glitter when you're mixing it.
Here is a closer picture so you can see it a little better.
Supplies used:
Cardstock: Smoky Slate, Basic Black, Basic Gray
Other paper: Red Glimmer Paper
Stamp sets: Ornament Keepsakes, More Merry Messages
Ink: Basic Black, Versamark
Embellishments: Silver 1/8" Ribbon, Black Embossing Powder, Silver Stampin' Glitter
Punch: Decorative Label
Tools: Heat Tool, Festive Paper Piercing Pack, Paper Piercing Tool, Stampin' Pierce Mat
****BLOG CANDY ALERT****
As a thank you for helping me make it to 100; one lucky reader will receive a Stampin' Up! goodie bag from me with products valued at $25! All you have to do to be eligible to win is leave a comment below letting me know what you love about my blog, or what you would love to see. I will draw the winner from all comments posted before 8am Monday, December 9th.
12.04.2013
12 Cards of Christmas-Day 2
Today I'm going to share with you my husband's favorite out of all the cards I made. He says he really likes this one, though part of me wonders if he picked a favorite to get me to leave him alone!
Supplies used:
Cardstock: Whisper White, Wisteria Wonder
Stamps: Snow Swirled (retired), More Merry Messages
Ink: Versamark
Embossing Powder: Gold, Early Espresso
Ribbon: Early Espresso 1/4" Stitched Grosgrain Ribbon
Tomorrow will be my 100th post! There will be some serious blog candy to give away. Come back and check it out!
12.03.2013
12 Cards of Christmas-Day 1
Good gravy, I took quite a blogging hiatus. It was unintentional. It's just crazy how quickly the days can sneak past this time of year!
I hope you've gotten your Christmas cards made, started, or at least designed. If not, I'm going to share with you the 12 Cards of Christmas to inspire you. (and a little secret, I've made over 80 Christmas cards this year, but not actually designed or made the ones I'm sending out myself!)
The first one is simple, but one of my favorites of this year's bunch.
Supplies used:
Cardstock: Crumb Cake, Cherry Cobbler, Very Vanilla
Stamp set: Sweet Essentials
Ink: Gumball Green
DSP: Be of Good Cheer (retired)
Ribbon: Crumb Cake Seam Binding
Framelits: Holiday Collection (retired)
11.14.2013
Christmastime
Thank you so much for joining us for the November Stylin’ Stampin’ Squad Blog Hop! This month our projects focus on Christmas. While we yet have to give thanks this month, some of us are already thinking about sending Christmas cards, what kind of packaging to present gifts in and how we want to deck our halls. On this month’s blog hop we are showcasing many of the Stampin’ Up! products that are available in the Holiday Catalog. You will see everything from cards to gift tags to 3-D décor and gift packaging. We hope you enjoy seeing how we use the products to create our projects and feel inspired to come up with some great projects of your own.
Remember you can order all of the products showcased from your Stampin’ Up! Demonstrator.
You should have just left stop number 2 on the Stylin’ Stampin’ Squad blog hop – Dawn of Dawn's Creative Chalet. If so, you are in the right spot. If a link doesn’t work or you get off track, you will find the full blog hop lineup below.
I made a flip card to share with you today.
The base is Perfect Plum. I used a strip of DSP from the Winter Frost Specialty pack. I embossed the second smallest snowflake from Festive Flurry in silver on Perfect Plum. I stamped the smallest snowflake in Coastal Cabana on the Shimmery White cardstock. I then cut both snowflakes out with the Festive Flurry framelits.
I used the scallop circle from the Circle Thinlets to cut out the Silver Glimmer paper. The greeting is stamped in Perfect Plum on Shimmery White and also cut out with a framelit from the Circle Thinlets. The greeting is from More Merry Messages.
As you can see, I cut the base longer to create an extra flap. Now there is plenty of room to write a message to your special recipient.
Thanks for joining us today. Next up is Annie from Love Me Cards.
Blog Hop Participants:
Pam S. of Stampin' in the Sun
Dawn S. of Dawn's Creative Chalet
Darcy J. of DJ's Stampin' Place <------ You are here
Annie L. of Love Me Cards
Cynthia R. of Ink-a-Doodle Creations
Jamie H. of Unique Ink
Kim R. of Stamping with Kim
Tonya B. of Stampin' with Tonya
Diana E. of Stampin' Fun with Diana
Heidi B of Stuck on Stampin'
Bree R. of Craft-Somnia
Anastasia R. of Stampin' Blondie
Pamela W. of Stinky Tofu
Jennifer B. of NW Stamper
Kristina M. of Mama's Sanity
Shellie G. of Craft Smashup
10.31.2013
On A Roll...It's Ribbon!
Today our focus is ribbon. I have used lots of ribbon on lots of cards over the years. I'd say it's probably my favorite embellishment. However, it was always "straight across as one of the layers." For the past year or so, I've started branching out and using it in different ways.
For instance, a ribbon wreath:
I found this idea online, and then changed it up a little bit to make it my own. I used the 1-1/4" circle and punched out a piece of cardstock. I saved that piece to use on some project later. I then took the 1-3/4" circle and punched around where I had already punched, creating a ring. Next, I cut approximately 20" of the Pistachio Pudding 3/8" Ruffle Stretch Trim. This ribbon is easy to work with for projects like this, and gives the wreath dimension. I wrapped the Ruffle Trim around the ring, securing it with glue dots. The knot is 3/8" Stitched Satin Ribbon in Raspberry Ripple.
This was a fun card to make. I hope you enjoyed it. While I didn't have help while making it (which is surprising; especially when I dropped the spool of ribbon), I did have help as I was preparing to take the picture.
Head over to SSINK to see some other ribbon creations!
10.23.2013
Twas the Night Before Christmas Sketching
Today I have a fun, and easy to mass produce, Christmas card for you. This card features the CCMC273 Sketch Challenge from Create with Connie & Mary.
And here is what I made with it:
The supplies I used are:
Cardstock: Pistachio Pudding and Real Red
DSP: Winter Frost Specialty and 2012-2014 In Color DSP Stack (Gumball Green)
Ink: Real Red
Stamps: Perfectly You
Tools: Big Shot, Holiday Ornaments framelits, Paper Snips, 2 1/2" Circle punch
Embellishments:Large Rhinestones Basic Jewels
It is lots of fun looking at how many variations there can be of virtually the same card. None of them look the same! Check them out by clicking on the CCMC link above.
This card also serves as my Design Team card for Stylin' Stampin' INKspiration today. Make sure to check out the other designer's cards as well! There are some cute, cute, cute ones!
I'll see you tomorrow when I will be sharing a simple card that I loved making! Also, you definitely don't want to miss out Friday when SSINK will feature our Friday Favorites!
10.11.2013
Punching Up New Cards
Have you tried out our new Envelope Punch Board yet? I love it!
To be honest with you, I've only used it to make one envelope. However, it's gotten lots of use making cards. Making cards, you say?
I even used it to make a gift card holder.
To be honest with you, I've only used it to make one envelope. However, it's gotten lots of use making cards. Making cards, you say?
Supplies:
5.5” X 8.5” Always Artichoke Cardstock
4.25” X 5.5” DSP (Season of Style)
2” X 2.5” Whisper White Cardstock plus big scrap for image
2.25” x 2.75” Early Espresso Cardstock
1.5” x 2” Always Artichoke cardstock
approx. 4.5” Whisper White 5/8” Organza Ribbon
Merry Little Christmas stamp set
Scentsational Season stamp set with Holiday Collection framelits (retired)
Instructions:
Score card base in half (4.25”), fold and crease with bone folder
Glue DSP to front of card (Anywhere Glue Stick)
With the Envelope Punch Board, line left side of card front with left side of opening, punch. Line left side of card front with 3” mark and punch again. Flip card over and repeat for card back.
Use Paper Trimmer to cut from middle dimple down to remove excess piece.
Use corner rounder on Envelope Punch Board to round corners.
Attach ribbon using Sticky Strip
Stamp greeting in Cherry Cobbler on Whisper White cardstock. Attach to Early Espresso cardstock.
Stamp desired image on Whisper White cardstock scrap, cut with framelits.
Adhere to Always Artichoke cardstock with Stampin’ Dimensionals.
Attach elements to card front.
I even used it to make a gift card holder.
Supplies:
4.25” X 11” Wild Wasabi Cardstock (card base)
3.75” X 6.5” Very Vanilla Cardstock (insert)
2.25” X 2.25” Cherry Cobbler Cardstock
2” X 2” Very Vanilla Cardstock
Season of Style Designer Washi Tape
Very Vanilla scrap cardstock
More Merry Messages stamp set
Scentsational Season stamp set (retired)
4.25” X 11” Wild Wasabi Cardstock (card base)
3.75” X 6.5” Very Vanilla Cardstock (insert)
2.25” X 2.25” Cherry Cobbler Cardstock
2” X 2” Very Vanilla Cardstock
Season of Style Designer Washi Tape
Very Vanilla scrap cardstock
More Merry Messages stamp set
Scentsational Season stamp set (retired)
Instructions:
Score card base at 2”, 7 ¼”, 7 3/8”, fold and crease with bone folder
Score insert at 1 ¾” and 6”. Fold small flap in opposite direction.
Use Washi Tape to hold “pocket” together on card base.
Use Envelope Punch Board on top flap of card base at 1” & 3.25”.
Stamp on “pocket” of insert if you desire.
Put Sticky Strip on small flap of insert. Slide insert pocket into card base pocket.
Remove backing on Sticky Strip and close card to attach.
Stamp image on Very Vanilla cardstock with Wild Wasbi ink.
Layer onto Cherry Cobbler Cardstock.
Stamp greeting in Wild Wasabi on to scrap of Very Vanilla. Punch with Modern Label Punch.
Attach greeting over top of washi tape.
All of these cards I created and made kits for the attendees of my card buffet on World Card Making Day.
Thanks for stopping by! If you'd like to see a picture tutorial or video tutorial; leave a comment below and you may just see your wish granted very soon. ;)
Subscribe to:
Posts (Atom)