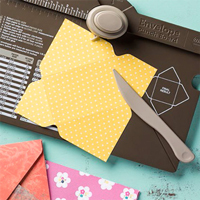
Showing posts with label envelope punch board. Show all posts

3.10.2015

Envelope Punch Board Card

I believe that I've only made two actual envelopes with my Envelope Punch Board. However, I LOVE all of the other fabulous projects you can make with it! 

I found the idea for this card on Pinterest. (Yes, I do more that just pin a million things!) Here is the card I created with the idea, as well as a tutorial for the jar. 


To start with, you need a 3" x 4" piece of DSP, as well as a 5/8" x 21/4" piece of coordinating paper. I was going to use Vellum, and then changed my mind. 


On the 4" side, you will line the "top" of the jar up with the right edge of the arrow on the punch board (fig. 1). Punch. Then flip the paper over and repeat on the other side. Use the corner rounder on the punch board to round the bottom two corners. Figure 2 is what your project should look like at this point in time. Next, take paper snips and cut off the "points" at the top (fig. 3). 


I used the Project Life by Stampin' Up! corner rounder to round the corners of the "lid" of my jar. Glue the lid to the jar, making sure that the tops are flush. You will then use your paper snips to trim the jar around the lid. (That will make sense when you see it glued together). 

You have now completed your jar and can embellish and use it as you please! These would make great tags or bookmarks as well! 

Other Stampin' Up! products used include:
  • Rose Red cardstock
  • Painted Blooms Designer Series Paper (the background and the lid) 
  • Irresistibly Yours Designer Series Paper (the jar) 
  • Daffodil Delight ink (with a sponge dauber)
  • Simply Wonderful stamp set
  • Rose Red ink
  • Whisper White card stock
  • Scallop Oval punch
  • Gold Baker's Twine
  • Bitty Butterfly punch
  • Basic Pearls
Want to see more INKspired ideas for the Envelope Punch Board? Click on the button below! 


1.07.2015

You Are Awesome!

I hadn't ever taken notice of Big News in the catalog, but when it went on sale during the Online Extravaganza at the end of November, I decided to order it. I'm so glad that I did. I love it!


I was inspired for the layout from one of the swap cards I had received from Cynthia at our SSINK DT Convention Swap. I liked how she had used the Envelope Punch Board to embellish her layer.

Want to know what else is awesome? This is my 300th blog post! Thank you so much for following! 

11.12.2014

Thanksgiving Table Decor

Have you started planning your Thanksgiving Table Decor? I decided this year that I would make a place card of sorts that each guest can journal on.


Here is what the inside looks like:


I used the Envelope Punch Board to create the envelope to hold the journaling card.


I decided that my inner card would be 3" x 7" so I found on the Envelope Punch Board that my Chocolate Chip card stock needed to be 8-1/4" x 8-1/4".


Per the instructions on the punch board, I lined up the left edge at 2-3/4" and punched and scored.


Next, I turned my paper counter-clockwise and lined the "tail" up with the score mark I just made. I punched and scored again. I repeated it on the other two sides and finally had this:


I trimmed off one of the small flaps at its score mark so that I would have an open top. I also had to trim the two larger flap to create this:


The only adhesive I used was two lines of Fast Fuse on the outer most flap:


Here is my finished envelope:


I used the following supplies to embellish it with:

  • Very Vanilla cardstock
  • Epic Alphabet stamp set
  • Gratitude For Days stamp set
  • 1-3/8" Circle Punch
  • Scallop Circle Punch
  • Burlap Ribbon
  • Tangelo Twist ink
  • Tangelo Twist cardstock
  • Autumn Wooden Elements
  • Pumpkin Pie Blendabilities - Darkest


I hope you've been INKspired to use Stampin' Up! to decorate your Fall Feasts table. Check out Stylin' Stampin' INKspiration for a fun centerpiece from Shellie! 

6.06.2014

Wedding Card & Gift

My wedding card and matching gift box feature new colors and the Envelope Punch Board.


I hope that I have a wedding to go to soon that has this color scheme because it's so pretty, and then I have my card and gift already made!

The card features Blackberry Bliss, Champagne Glimmer Paper (it's on sale today!) and the Moonlight Designer Series Paper Stack. The "Mr. & Mrs." is from Label Love and then punched out with the coordinating Artisan Label punch.


I've been giving a lot of gift cards lately, and thought it would be more fun to give it in a gift box than just in the card. To make the gift box I took a piece of Blackberry Bliss cardstock cut to 5"x7" and scored it at 1-1/2" on each side. Next, I used another piece of the Moonlight DSP cut to 4"x6" and scored it at 1" on all sides. Grabbing the Envelope Punch Board, I punched each corner at 1", flipped the paper over and repeated the process. Next I cut along the short score lines on two sides of the box and lid places to make flaps. I put some Fast Fuse on the flaps and folded and glued together.
The lid will slid over the box if you hold your tongue just right and maneuver the cardstock just right.

This box will hold a gift card!


The inspiration for the box came from the 2014-2015 Annual Catalog. On page 15, you will find many different ideas for dressing up your packaging. I tied the ribbon around the box with a bow. Then I made a separate "free-standing" bow and glued it on top of the first bow with a glue dot.


Head on over to SSINK to find other wedding surprises!

3.18.2014

Envelope Punch Board

While I have used the Envelope Punch Board on many of my cards and projects, I hadn't used it to make an actual envelope yet. Well as of last night, that changed. Wow! It was so easy and quick!

I took the card that I made for the hop last Thursday to work to give to a girl in another office who is having some major health issues. However, since the flowers hung over the edge of the card, it wouldn't fit in our envelopes. So I took another piece of Designer Series Paper from the same package that I used on the card, and made one.


I sealed the bottom flap with Sticky Strip, and put little pieces of Sticky Strip on the top flap so it will stay sealed in the mail, but she'll still be able to tear it open when she receives it.

If you haven't gotten this fabulous tool yet, I highly recommend it! Click on the image below and you can purchase the punch board directly from my online store!


12.27.2013

Gift Certficate Holder

Any guesses what my favorite tool is these days? The Envelope Punch Board! I've got another project for you today that I used it on. This project was again simple and quick!


The Coastal Cabana cardstock is 5-1/2" x 8-1/2" just like a normal card base. I scored it at 2-1/8" and 5-1/4". Once you fold it, you may have to trim of a little bit from the top flap. I stamped the front with Festive Flurries in Versamark ink. (If my Coastal Cabana walked to your house, please send it back home!)
The belly band is from the Raspberry Ripple section of the 2012-2014 In Color DSP stack. The greeting is from Label Love and punched with the coordinating Artisan Label punch.


The inside is where I used the Envelope Punch Board to spruce things up a bit. I used MDS to create a gift certificate for my friend. Want to know what the certificate is for? Stampin' Up! products, of course! Now, I just hope she doesn't see this post before I give her the gift! 

Happy stamping!

12.26.2013

Envelope Punch Board Treat Box

Greetings! Are things getting back to normal for you after the holiday craziness?

This is the treat box I created today as the featured designer at Stylin' Stampin' INKspiration.


I created a photo tutorial on how to recreate this box. You can get to it by clicking the Stylin' Stampin' link above the pictures.

Inky love,

Darcy

12.23.2013

12 Cards of Christmas-Day 11

We're almost there. The homestretch to Christmas is in sight. Hopefully that doesn't spark a bit of panic in you!

Today's card is a CASE of one I did in October. You can see the original card and instructions for making it here.


Supplies used:
  Cardstock: Tangerine Tango, Island Indigo, Whisper White
  DSP: Winter Frost Designer Series Stack
  Stamps: Merry Little Christmas, More Merry Message (inside)
  Ink: Tangerine Tango, Island Indigo (inside)
  Tools: Envelope Punch Board, Stampin' Pierce Mat, Paper-piercing Tool, Stamp-A-Majig
  Embellishments: Sycamore Street Ribbon & Button Pack (available on Clearance Rack here)
  Adhesives: SNAIL, Sticky Strip, Glue Dots

See you tomorrow for the 12th Card of Christmas!

12.20.2013

12 Cards of Christmas-Day 8

How is your Christmas preparation going? Hopefully better than mine! It's going to be full on arts & crafts in my house for the next four days while I finish my Christmas cards and gifts!

Here is a fun file folder card I made with the Envelope Punch Board:


Supplies used:
   Cardstock: Coastal Cabana, Shimmery White
   DSP: Winter Frost
   Stamp set: More Merry Messages
   Ink: Real Red stamp pad, Real Red Ink refill
   Tools: Big Shot, Envelope Punch Board, Stampin' Spritzer
   Accessories: White Organdy Ribbon, Silver Taffeta Trim, Festive Flurries framelits

10.11.2013

Punching Up New Cards

Have you tried out our new Envelope Punch Board yet? I love it!


To be honest with you, I've only used it to make one envelope. However, it's gotten lots of use making cards. Making cards, you say?


Supplies:
5.5” X 8.5” Always Artichoke Cardstock
4.25” X 5.5” DSP (Season of Style)
2” X 2.5” Whisper White Cardstock plus big scrap for image
2.25” x 2.75” Early Espresso Cardstock
1.5” x 2” Always Artichoke cardstock
approx. 4.5” Whisper White 5/8” Organza Ribbon
Merry Little Christmas stamp set
Scentsational Season stamp set with Holiday Collection framelits (retired)


Instructions:
Score card base in half (4.25”), fold and crease with bone folder
Glue DSP to front of card (Anywhere Glue Stick)
With the Envelope Punch Board, line left side of card front with left side of opening, punch. Line left side of card front with 3” mark and punch again. Flip card over and repeat for card back.
Use Paper Trimmer to cut from middle dimple down to remove excess piece.
Use corner rounder on Envelope Punch Board to round corners.
Attach ribbon using Sticky Strip
Stamp greeting in Cherry Cobbler on Whisper White cardstock. Attach to Early Espresso cardstock.
Stamp desired image on Whisper White cardstock scrap, cut with framelits.
Adhere to Always Artichoke cardstock with Stampin’ Dimensionals.
Attach elements to card front.


I even used it to make a gift card holder.


Supplies:
4.25” X 11” Wild Wasabi Cardstock (card base)
3.75” X 6.5” Very Vanilla Cardstock (insert)
2.25” X 2.25” Cherry Cobbler Cardstock
2” X 2” Very Vanilla Cardstock
Season of Style Designer Washi Tape
Very Vanilla scrap cardstock
More Merry Messages stamp set
Scentsational Season stamp set (retired)


Instructions:
Score card base at 2”, 7 ¼”, 7 3/8”, fold and crease with bone folder
Score insert at 1 ¾” and 6”. Fold small flap in opposite direction.
Use Washi Tape to hold “pocket” together on card base.
Use Envelope Punch Board on top flap of card base at 1” & 3.25”.
Stamp on “pocket” of insert if you desire.
Put Sticky Strip on small flap of insert. Slide insert pocket into card base pocket.
Remove backing on Sticky Strip and close card to attach.
Stamp image on Very Vanilla cardstock with Wild Wasbi ink.
Layer onto Cherry Cobbler Cardstock.
Stamp greeting in Wild Wasabi on to  scrap of Very Vanilla. Punch with Modern Label Punch.
Attach greeting over top of washi tape.

 
All of these cards I created and made kits for the attendees of my card buffet on World Card Making Day. 

Thanks for stopping by! If you'd like to see a picture tutorial or video tutorial; leave a comment below and you may just see your wish granted very soon. ;)