I know that this year I have too many irons in the fire, and that I need to start thinking about Christmas now, so I'm not freaking out at the last minute starting December 20th. Therefore, I used My Digital Studio to create a journal so I can track my lists for cards, gifts, and what still needs to be done.
This is the cover of the journal:
If you're not familiar with MDS, contact me for a one-on-one demonstration, or check out mydigitalstudio.net.
Check out Stylin' Stampin' INKspiration for a variety of current favorites of the Design Team.
A glimpse into my stamping home where I will share with you projects and fun techniques using my favorite Stampin' Up! products.
8.29.2014
8.28.2014
Introducing...
...the 2014 Holiday Catalog from Stampin' Up! It is full of spectacular items and fabulous project ideas. The best part is that you can order from it starting today! Drop me a line if you don't have your copy yet, and I'll get one in the mail to you immediately.
I was so excited to use all my new stuff, that I had to make two projects to show today! Fall is my favorite time of year, and I can't wait for it to arrive. (I also hope we actually have some fall weather this year.) I made these as a sign to Mother Nature that she can hurry up with the crisp weather.
First up is the fun box. I made it with the brand new Gift Box Punch Board. I used a full 12" x 12" sheet of DSP from the Color Me Autumn Designer Series Paper package and followed the directions on the punch board to complete it. The great thing about this box, is that it will technically go together with no adhesive, but if you want to make it more sturdy and fill it with stuff, you would just need to glue the inside flaps down to the sides.
I used the Gold Sequin Trim (found in the Annual Catalog) to tie around the box.
This is what your paper looks like once you have punched and scored it before assembly. It was super easy to assemble.
For my card, I used another sheet of DSP from the Color Me Autumn stack. Did you know that almost all of our DSP is double-sided? This card features both sides of one sheet. The pattern that is on the side pieces reminds me of Indian corn.
The stamp set that I used on the tag is For All Things. It is probably my favorite set out of the Holiday Catalog. The inks that I used are Mossy Meadow, Hello Honey and Soft Suede. I'm going to have to make more cards with those three colors, as they are really pretty all together.
Check out more projects feature brand new products today at Stylin' Stampin' INKspiration.
8.27.2014
Watercolor Wednesday
This is the card I created for Watercolor Wednesday at Stylin' Stampin' INKspiration today. The open hearts from Groovy Love make a great outline for coloring. I stamped them in Cherry Cobbler onto a piece of Watercolor Paper. Then I used the Aqua Painters with Cherry Cobbler ink to color them. The greeting is from @SoSocial and was also stamped using Cherry Cobbler ink. The Hearts Border Punch created the border at the top before I mounted the layer on to a Cherry Cobbler base. Every card needs a little sparkle, so I added the clusters of Basic Rhinestones.
8.25.2014
For The Man
School started last Monday, so things have been a little crazy around here. Is it the same for you? Due to that, I missed making a card to share last Friday for the Amazing Birthday post at SSINK. However, I incorporated the idea I had for that card into my masculine card for today.
When I saw the "It's For You" stamp in Amazing Birthday, the outside reminded me of a grommet. I embossed three of them with Silver Embossing Powder on Marina Mist cardstock. The 3/4" Circle Punch will perfectly punch out the center. Using the 1-1/4" Circle Punch to punch out the whole image will leave a small border around your design. I used the 1" Circle Punch and the 1-3/8" Circle Punch to create a Real Red layer behind my grommets. So as not to be wasteful, I used one of the centers from the stamped images and one of the centers from my Real Red to create my greeting. I felt that tying it on to the ribbon with some White Baker's Twine helped to tie it in with the rope paper from the Maritime Designer Series Paper pack.
Do you notice anything unfamiliar on this card? The Lucky Stars Embossing Folder will be available for customer purchase on August 28th!
As always, thanks for stopping by. Most of my projects I create specifically to share with you, and I love knowing that you've been here to enjoy them. You can also stop over at SSINK for more masculine inspiration.
8.20.2014
Make It Quick
I made today's quick and easy card so quickly that I forgot to emboss the stars on the Perfect Plum piece like I had intended! However, you would have never known if I hadn't shared that secret with you.
One fabulous thing about the Star Framlits is that you can create star "outlines" by cutting with one size, and then running it through the Big Shot again with a smaller size centered on the piece you just cut.
The Hooray stamp can be found in the Project Life Remember This set. I fed each side of the cardstock through the Mosaic Punch to create a different type of label punch element.
Check out more quick and easy cards today at SSINK!
8.19.2014
Two-Step Technique
No, there will be no dancing today. Though if you feel the desire to get up and two-step, by all means I hope you do! Today we're two-step stamping. All that means is that you stamp one image on top of another one.
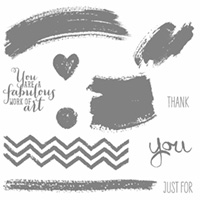
This card features the ever popular Work of Art stamp set. The swish was inked up with Wisteria Wonder and then stamped off once before stamping on the cardstock so that it was a little lighter. Then I stamped the You on top of each one with Strawberry Slush ink. The Just For is in Lost Lagoon ink to match the ribbon embellishment.
Two-step stamping is a great way to liven up a card without having to spend a lot of extra time on it. For more great ideas, check out SSINKspiration.
8.18.2014
#ssinkls12 - Scrapbook Sketch
As mentioned in my Project Life post last week, we spent my birthday at Kauffman Stadium. I used a picture of the hubby and me from that day for today's layout sketch.
I used My Digital Studio to create this page. The background is Villa in Bashful Blue. I used one of the Starburst Sayings punches and changed the color to white to layer behind our picture. The punch and the picture have a Brilliant Blue Mat.
The stamps are all from Party Hearty. I changed the presents to Melon Mambo. The coloring tool made it easy to give my candles a Yo-Yo Yellow flame with Night of Navy bases!
Jokerman is the font I used with a text box to type out Birthday at The K in Night of Navy. I felt like it still needed a little something, so I added some Smoky Slate ink splatters around the page.
Did you know that you can play along with the Sketch Challenge today at SSINK?
8.15.2014
Happy CASE Day
Our mission today at SSINK is to CASE a project from the 2014-2015 Stampin' Up! Annual Catalog. There were many projects that caught my eye, however there were two cards that I kept coming back to. I ended up using elements of both of them for today's card.
I have yet to find a color that Blackberry Bliss does not pair well with. As you can see, it goes well with Tempting Turquoise!
Here is the card from the catalog that most of my inspiration came from:
I used a bigger piece of DSP, and lined the top and bottom with silver ribbon. I have used this stamp before, but honestly didn't realize there were dots in the HAPPY until I saw this picture. I felt that my card needed a little something more, so I took inspiration from the bottom right hand card in this picture:
For this part, I used a strip of Silver Foil Paper and my Fringe Scissors. I wanted to cover up the middle part where the paper wasn't fringed, so I used a piece of Blackberry Bliss ribbon.
The Stampin' Up! catalog is a great place to draw inspiration from if you are in a creative rut. I would be happy to send you a copy if you don't have one. Just email me your address, and one will be on its way to you! I hope that my projects also inspire you. I would be honored to see anything that you CASE from my blog postings.
8.13.2014
Swap Cards Blog Hop
Last month our group decided to make cards for each other that would be swapped at Convention. A HUGE thank you to Kim who was nice enough to take my swaps with her and mail them back to me after convention! Of course, we can't keep all of the card love to ourselves; so we're sharing our cards with you today on our monthly blog hop!
This was actually the card that inspired my Blendabilities post, as I was amazed at how different the colors looked on the watercolor paper. This was also my first time using our watercolor paper (I know, I know; I can't believe it either.).
I love the Watercolor Thank You single stamp. It's a perfect size to use with the Deco Label Framelits. The framelits are great because you can create a perfect mat to layer under your greeting. Maybe it's the flowers, but every time I look at this card, the Baked Brown Sugar Thick Baker's Twine reminds me of ropes on a swing.
Are you curious what 42 Blendabilities colored flowers look like? (Well you get the idea.)
Thank you for stopping by today. Head over to see Donna's fabulous card by clicking the next button below.
- Darcy J. of DJ's Stampin' Place
- Donna S. of Organized Chaos
- Cynthia R. of Ink-A-Doodle Creations
- Jennifer C. of Happy 2 Scrap 4 Life
- Kim R. of Stamping with Kim
- Diana E. of Stampin' Fun with Diana
- Tonya B. of Stampin' with Tonya
- Shellie G. of Craft Smashup
- Kathy P. of Katrina P's Creative Corner
- Bree R. of Craft-Somnia
- Heidi B. of Stuck on Stampin'
- Pam S. of Stampin' in the Sun
- Darla R. of Stampin' with Darla
- Erica B. of Stamping Starlette
Sympathy Order
A couple weeks ago, I posted the birthday cards that I made for my husband's grandma. She ordered sympathy cards at the same time, so I'm sharing those today.
The card base is Sahara Sand with a Calypso Coral layer. The "With Sympathy" is stamped in Calypso Coral, as is the verse on the inside. The greetings and flower are all from Bloom With Hope. Any guesses what I used to color the flowers? You got it! Blendabilities!
The card base is Sahara Sand with a Calypso Coral layer. The "With Sympathy" is stamped in Calypso Coral, as is the verse on the inside. The greetings and flower are all from Bloom With Hope. Any guesses what I used to color the flowers? You got it! Blendabilities!
8.12.2014
Take Me Out To Project Life
I've said it before, but can I say it again? I LOVE Project Life by Stampin' Up!! The pages come together so quickly, and I don't have to worry about cropping every single picture and gluing them all down!
I was lucky enough to get Royals tickets so that I could spend my 35th birthday at The K. A four hour rain delay might not have been so lucky, but that's a tale for another day.
I originally hadn't ordered the 6" x 8" PLxSU pages because I only had the 12" x 12" album. Then I realized that you could put the smaller pages in the bigger album, so they went on my next order! The smaller size was perfect to start my Royals Day pages because I could use the small pockets for my tickets, along with a picture of the scoreboard from our seats.
I used two of the Project Life cards from the Playground Card Pack to layer behind the tickets.
Check out SSINK today for more Project Life goodies, and stay tuned as I'll share my birthday story with you when I get the rest of the pictures in my album!
8.11.2014
Flowering Sketch
It's time to get creative with the monthly card sketch at SSINKspiration. You will definitely want to go over and check out the variety of ways that the design team was INKspired by this sketch.
Even though fall is my favorite time of year, and I'm anxious for it to get here; I'm having a hard time letting go of the bright colors of summer.
This card features a Rich Razzleberry base with a layer of Designer Series Paper from Confetti Celebration. I stamped the "hello" from Endless Birthday Wishes in Rich Razzleberry, directly on to the DSP.
My favorite part of this card is the flowers. I cut three flowers out of Baja Breeze with the Floral Frames Framelits. To give them some added texture, I used my bone folder to curl them from both sides. This technique breaks down the fibers of the cardstock, allowing you to peel the layers apart. What you are seeing on this card is the inside of one of the layers. One of the many reasons that I love Stampin' Up! cardstock and the fact that it is dyed all the way through.
For the center of the flowers, I got out my Dots & Stripes Decorative Masks, along with a scrap of Daffodil Delight cardstock and Tangerine Tango ink. I used a sponge dauber to fill in three of the dots on the mask. Then I used my 7/8" Scallop Circle Punch to punch them out. Perfect!
The grand finale for this card was to layer a piece of Early Espresso cardstock behind the flowers to give them a little more "pop."
As always, pin it if you love it. Remember to play along with our sketch by linking up at SSINK, and tagging your project with #ssinkcs12 anywhere that you post it!
Subscribe to:
Comments (Atom)


